- Oct 27 Thu 2016 11:20
-
How to Enable SSH & SFTP Server in Mac OS X with Remote Login

- Oct 27 Thu 2016 10:55
-
How to Enable the Root user on Mac OS X 10.12

1. 開啟System Preferences...
2. 點選
3. Click the lock to make changes.
4. 輸入User Name and Password. Click Unlock
5. Click Login Options

- Oct 12 Wed 2016 13:49
-
SSL Certificate Generating Guide in Linux
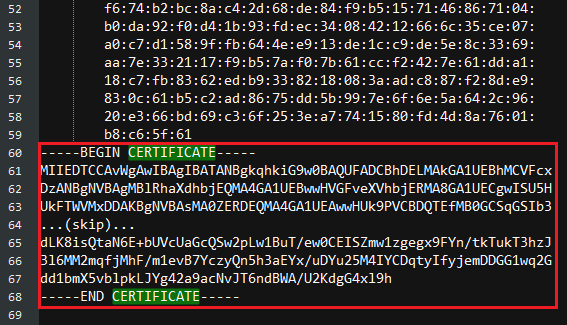
1.Install OpenSSL Toolkit (OpenSSL toolkit absolute path: $openssl_dir)
# tar zxvf openssl-1.0.1e.tar.gz
# cd openssl-1.0.1e
# ./config
# make
- Oct 12 Wed 2016 13:48
-
Exchange 2003 support TLS setting
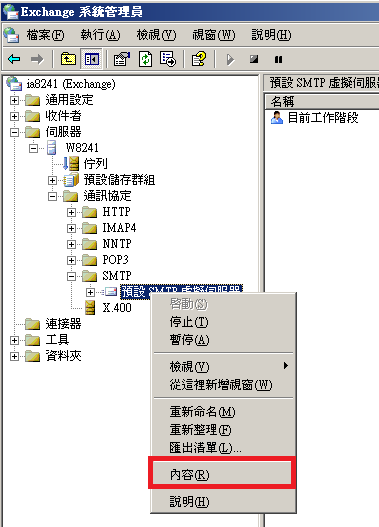
Exchange 2003 support TLS setting:
1. Create a new certificate:
Open Exchange System Manager -> Servers -> Protocols -> SMTP -> Default SMTP Virtual Server (Right-Click) -> Properties
Open Exchange System Manager -> Servers -> Protocols -> SMTP -> Default SMTP Virtual Server (Right-Click) -> Properties
-> Access -> Certificate
- Oct 12 Wed 2016 13:47
-
How to Enable IPv6 on RHEL

Method 1: Enable IPv6 setting on X-Window
1.System, Preferences, Network Connections
2.On Wired tab, select system eth0, Edit
- Oct 12 Wed 2016 13:45
-
Check VM is Normal Shutdown
Windows OS:
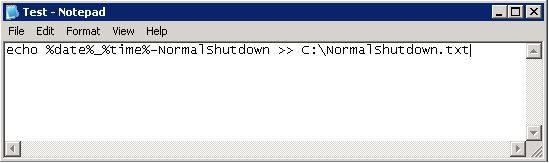
1. Create Test.bat file.
Enter:
echo %date%_%time%-NormalShutdown >> C:\NormalShutdown.txt
2. Run gpedit.msc
- Oct 12 Wed 2016 13:44
-
Radius server 架設
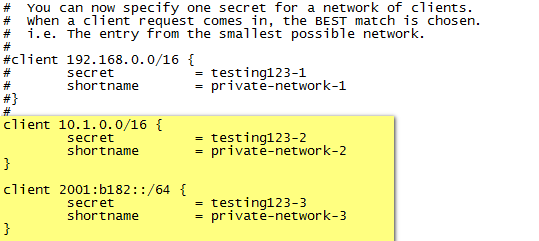
=== 下載與安裝Freerdius: ===
1.到Freeradius官網下載 (http://www.freeradius.org)
2.下載到/tmp
3.tar zxvf freeradius-1.1.7.tar.gz
4.cd freeradius-1.1.7
2.下載到/tmp
3.tar zxvf freeradius-1.1.7.tar.gz
4.cd freeradius-1.1.7
- Oct 12 Wed 2016 13:38
-
Radius_IPv6 設定

1